Difference between revisions of "Tomb Raider II Story"
m |
m (→Epilogue: Home Sweet Home) |
||
| Line 314: | Line 314: | ||
[[Image:Home.jpg|thumb|200px|right|Lara's travels is still not over, when the remainder of Bartoli's angry men track her down to England]] | [[Image:Home.jpg|thumb|200px|right|Lara's travels is still not over, when the remainder of Bartoli's angry men track her down to England]] | ||
| − | Lara returns home to England with the dagger of Xian, and is seen examining it on her bed, but then we hear tyre screeches and Dobermans from outside, and then her house alarm goes off along with the sound of breaking glass. Bartoli's remaining men have tracked her down to England and are attempting to steal the dagger. Lara opens her Gun Cupboard and takes the only weapon their, the Shotgun, and the excess of shells inside. There is also two large and one small medi packs inside, along with numerous flares. Lara has to kill all the Fiamma Nera's in the vicinity, in and outside her house, before she has to re-battle the Fiamma Nera sub-boss she fought with in [[Opera House]]. When he's dead, a clips shows Lara goes to the showers. She looks at the camera once there and says " | + | Lara returns home to England with the dagger of Xian, and is seen examining it on her bed, but then we hear tyre screeches and Dobermans from outside, and then her house alarm goes off along with the sound of breaking glass. Bartoli's remaining men have tracked her down to England and are attempting to steal the dagger. Lara opens her Gun Cupboard and takes the only weapon their, the Shotgun, and the excess of shells inside. There is also two large and one small medi packs inside, along with numerous flares. Lara has to kill all the Fiamma Nera's in the vicinity, in and outside her house, before she has to re-battle the Fiamma Nera sub-boss she fought with in [[Opera House]]. When he's dead, a clips shows Lara goes to the showers. She looks at the camera once there and says "Don't you think you've seen enough?" and shoots it with her shotgun. The credits then start at that point, but do not exit from them. Wait to the end, past the Final Statistics Screen that will appear, and you can select a new game, where you have ''all weapons with unlimited ammo''! This dramatically increases the easiness of the game. |
[[Image:The_End.jpg|thumb|200px|right|The End (this is seen at the end of the credits just before the final statistics screen)]] | [[Image:The_End.jpg|thumb|200px|right|The End (this is seen at the end of the credits just before the final statistics screen)]] | ||
(In the epilogue, it is unknown where Winston is, but as he is present at the Training Level of Tomb Raider 3, he has obviously survived the conflict of Home Sweet Home) | (In the epilogue, it is unknown where Winston is, but as he is present at the Training Level of Tomb Raider 3, he has obviously survived the conflict of Home Sweet Home) | ||
Revision as of 00:51, 30 May 2011
The following article will explain the story of Tomb Raider 2. Walkthrough detail information is not written in this article, but only brief information on what you have to do each level, such as keys or objects, but the following information is based on the FMV clips seen throughout the game. For full detail walkthroughs, see the tombraidergirl pages.
In brief, Tomb Raider 2 involves more enemies, larger levels and it introduces much more of modern life with the tombs which made Tomb Raider 1 famous.. The Offshore Rig levels involve key objects which are much more modernized (Machine Chips, Pass Cards). Also, the Offshore Rig levels have flashing electronic technology, never seen before. Many people believe that both Tomb Raider 2 and 3 lose the original Tombs that made Tomb Raider 1 popular. It also notable that Tomb Raider 2 contains much more human enemies than its predecessor, and an overall introduction into a more modern life.
The following item will show the vague level map of Tomb Raider 2, followed by the slightly more detailed information:
Contents
Level Map
China- 1 - The Great Wall
Venice
- 2 - Venice
- 3 - Bartoli's Hideout
- 4 - Opera House
Offshore Rig (Adriatic Sea)
- 5 - Offshore Rig
- 6 - Diving Area
The Maria Doria Ship
- 7 - 40 Fathoms
- 8 - Wreck of the Maria Doria
- 9 - Living Quarters
- 10 - The Deck
Tibet
- 11 - Tibetan Foothills
- 12 - Barkhang Monastery
- 13 - Catacombs of the Talion
- 14 - Ice Palace
China
- 15 - Temple of Xian
- 16 - Floating Islands
- 17 - The Dragon's Lair
England
- 18 - Home Sweet Home
Prelude
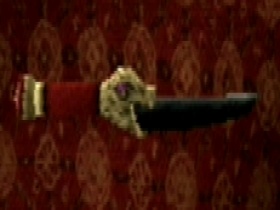
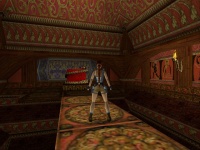
Tomb Raider 2 is all about getting the mystical Dagger of Xian, a mystical and historical artifact which can bestow the powers of a dragon onto the person who drives the dagger into their heart, thus surrendering their soul to the ancient power. If the dagger is ever removed from the heart of the person, now dragon, then they will melt down into a large carcass, powers ripped. The Tomb Raider 2 opening sequence showed this, when the current possessor of the dagger, the Emperor of China had decided to conquer the vast lands of China with the power of the dagger inside him.He was a force to be reckoned with, and as the China mainland fell, one group of brave Tibetan Monks fought against him and his forces. One monk (who seemed hazy, probably due to the heat of the dragon's flame) was not noticed by the dragon as he flamed a part of the Great Wall above him. The monk was right underneath the dragon, and so ripped the dagger from the heart of the beast. The effects were immediate, but not fast enough for the dragon to melt instantly; with one last breath of fire, the dragon burnt the monk into oblivion, before collapsing, and turning to mere bones. After the battle, the monks discovered the hidden entrance to where the dagger was first found, the Temple of Xian. With torches, they slowly made their way down the hallway, until discovering the door shaped as the symbol which recurs very often throughout the game. The Talion is still in the door, and so they turn it. The door dramatically opens, and one monk is sent through, while the others return to the surface with the Talion. He places the dagger into a dragon like slot, also called Dais, and the 'eyes' on it light up in purple when the dagger is inserted. Blue lights fill around the room, and the monk screams, followed by the camera zooming out of the Dais room, and then the door lights up for a second in the shape of dagger symbol.The Great Wall of China
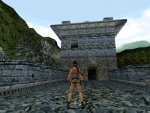
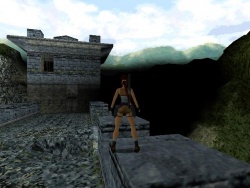
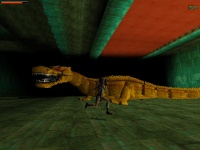
Lara is first seen as she descends from a helicopter circling the Great Wall of China in modern times, 1997 to be precise. The pilot could find no where to land the craft, so Lara simply said "No problem", and so descended her way down the rope to a patch of land aside the wall. She then fell down a slope to a small valley by the Great Wall, and gameplay begins. Lara must of heard that the Temple of Xian was hidden deep within the Great Wall, protected by numerous traps that, unfortunately, Lara must face. Lara makes her way up to the first Guardhouse, seen on the valley floor as the helicopter pulled away. After pulling the first switch inside, Lara has access to the the top of the wall (the camera pulls out at this point for an interesting view), and down into a pool on the right hand side of it, where the first key lies. This unlocks the second Guardhouse. Lara then makes her way through the dangerous traps someway underground. These traps include spiked walls, collapsible floor tiles (with spikes at the bottom) and slicing mechanical blades capable of killing Lara with one hit. These traps end with Lara being deposited (by a 'good' collapsible tile) into a large cavern like area. A rope sliding mechanism lies at the edge of a gigantic valley (home to two T-Rex's and the Gold Dragon). Using it takes Lara across the large valley, where the same door seen in the Prelude is seen, but with no Talion inserted. It's hard to believe, but the next 13 levels are all about just getting the Talion artifact, though for half the time, Lara does not know it.The Door Ambush
As she approaches the door to investigate the key mechanism, an armed member of the Fiamma Nera attacks her from the small ledge to one side of the cavern area. He hits the door, and his weapon, a Tommy Gun, flies out of his hands. Lara raises her pistols towards him as she says "Pardon me, if that was just your way of trying the doors for me..." , and orders him to divulge about what he knows about the dagger. He is initially curious about Lara, saying that somehow she doesn't behave like she has monk's blood. Lara replies by saying "I understand that "somehow" is in my favour. So indulge me about the dagger. I'd be indebted with your life." He then explains, though not very clearly, that the doors are waiting for the right person, and tries to get Lara to pledge her loyalty to the "sins and fortunes" of Marco Bartoli, who the follower believes is the one that the dagger would honor. He commits suicide by drinking an unknown liquid just after admitting who he worked for. Lara hacks into a nearby laptop to discover who Bartoli actually is, and discovers a link that he is currently in the Via Caravelli, in Venice.
The Venice Levels
Venice is very different from the usual tombs of Tomb Raider. The first transportation in the entire series is found in this tranquil (kind of) part of the game. However, don't believe that this little Italian holiday is easy; puzzles are constantly appearing through these three levels, along with tens of Fiamma Nera's and Brawlers.
Venice
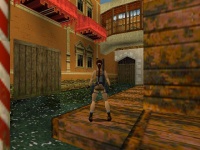
Lara arrives in Venice, through unknown transportation, but she is seen dropping from above the small avenue where she begins Level 2. Armed Fiamma Nera's are positioned all around this scenic level, as well as Rabid Dobermans and unarmed Fiamma Nera's. Lara, using her discovered speedboat, must make her way through the canals, dodging and killing those wishing to kill her. She must discover the switches that raise two iron gates so she can race her speedboat to Bartoli's hideout, through double, timed, doors and water mines that must be defused first with the second speedboat provided. There are three keys (Boathouse, Steel and Iron), and the latter two open doors that can access switches that raise one of the gates, or open something else which can eventually be used to find the switch. After Lara opens both, she guns her speedboat along the Iron Gate canal (it's a shortcut, and the only way to make it in time) once the button that opens the exit is pressed. Beyond the opened door is the hideout of Bartoli.
Bartoli's Hideout
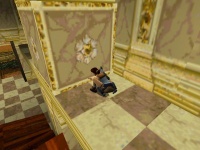
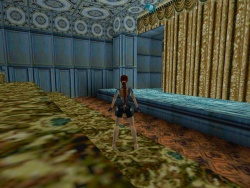
Lara gets into the hideout via the two double doors seen as the Level begins. After dealing with Armed Fiamma Nera's, Lara enters another section of the hideout, and then to the huge Ballroom,which is one big puzzle. Then, through the grand library, and into the outside area (where the hidden Uzis can be discovered, (see Tomb Raider 2 Secrets) and then she obliterates the hideout by detonating it with a key (The Detonator Key). Through the rubble, the long, sloped tunnel is the entrance to the Opera House (which evidently looks like the Venetian Opera House, La Fenice.)The Opera House
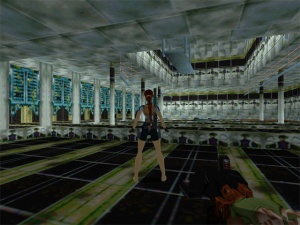
The Opera House is the final level in the Venice series, but has a more darker touch to it. More Fiamma Nera enemies reside here than anywhere else in Venice, along with one super baddie at the end; the Fiamma Nera Boss (or sub-boss, as it is not Bartoli). Firstly, Lara must find a way into the actual Opera House using the first Ornate Key, and then kill every baddie in the area before attempting to find the Relay Box, which operates the elevator in the area. This reveals a pool which contains a Circuit Board, which raises the stage of the Opera House when inserted into a panel in the control room. However, the control room cannot be accessed without the second Ornate Key, which is found in the ventilation system, full of electrical, killer fans. Then, once back in the control room, Lara raises the stage with the switch activated by the Circuit Board, and must fight several Fiamma Nera's before taking a path to above. Then, after moving past several more swinging sandbags, Lara has to confront the sub-boss in an airport storage area.Confronting the Sub-boss
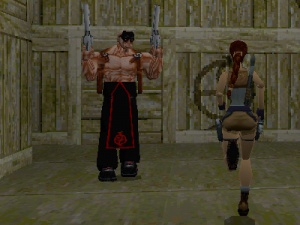
The Sub-boss is difficult to combat with, being extremely resistant to gunfire and he moves quickly, and is also deadly with his two large revolvers. Also note that you'll be fighting in a rather small space, which is also shared by two dobermans and two hidden Fiamma Nera's. These are the best way to combat the Fiamma Nera Sub-boss:- You'll be needing high power weapons such as the Shotgun or Grenade Launcher. It'll take around 7 to 9 Shotgun shots to kill him, or around 5 Grenades. Using the Uzis will just waste ammo, and the Pistols and Automatics are barely effective.
- Try to move around, but only subtly, as any large amount of movement will bring in the two dobermans, and you have enough to deal with without added strain. The two hidden Fiamma Nera's only appear when you move to the end of the chamber or press the high button on the wall respectively.
- If you manage to kill the dobermans, try to shoot while his back is turned. When he changes direction to face you, jump, rolling in mid-air, then continue shooting, then repeat the process when he turns.
When he dies, he'll drop a Grenade Launcher (if you don't have it already- but it's not that important, as you'll lose it in a minute). Jump over the boxes in the vicinity to reach a switch, which reveals a plane ready for take off, and the Level Exit.
Flight Ambush
As the clip shows, Lara first opens several boxes, probably trying to discover anything interesting in her search, but then overhears Bartoli and a follower talking in the cockpit. Bartoli is accusing his follower Fabio (also the driver) that his belief is too fragile, and punches him in the groin. The plane momentarily plummets, until the driver recovers. Bartoli then explains how he is destined for the dagger, and talks about the Seraph, and how his father was a disciple in its design. Lara, though does not notice it, but she is being approached by a bat-wielding Fiamma Nera named Eros from behind, and is knocked unconscious. The level then ends, along with the Venice location.
The Offshore Rig Levels
The Offshore Rig Levels are very different to Venice, with new more powerful enemies.
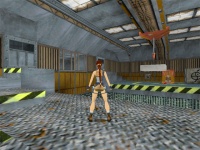
Offshore Rig: Re-arming
Lara arrives at an offshore Rig in the Adriatic Sea, but completely stripped of all her weapons, but she still has ammo, medi packs and flares. The main purpose of "Offshore Rig" is to get the weapons back that were stolen, starting with the pistols. The base order in which you can get the weapons back is this: Pistols, Automatic Pistols, Harpoon Gun (New weapon), Uzis (only if you collect all three secrets) and finally the shotgun. The Grenade Launcher cannot be reclaimed until at least Level 8 (and that requires collecting all three secrets too).
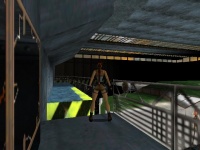
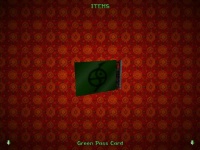
The pistols are hidden inside the plane, after you have escaped your prison cell. The pistols must be found to kill two Fiamma Nera (one armed, be careful to avoid him without the pistols) as one has a Yellow Pass Card which opens a door. In these levels, Keys are temporarily replaced with Pass Cards, that range from Yellow, Red, Green and Blue. There are five in total from both levels (Red Pass Card is used twice). The main objective of Level 5 is to redistribute water from one of two giant tanks to the other (this complex is just past the Red Pass Card door) so the player can use a path in the middle of them to access the Level Exit, but this path can only be used when the Green Pass Card is slotted into it's lock in the control room of that area.The Green Pass Card lies in a vast chamber pool below the trapdoor in the control room. You must find a ladder on one of the four main pillars and use that to access catwalk around the area, guarded by several Fiamma Nera's (all armed) that can be called Rig Workers and Rig Bosses. In the vicinity are the shotgun (dropped by a Rig Boss when you kill him) and the Uzis (only if you have collected the two previous secrets upon picking up the gold dragon, easy to see on the base of one of the pillars). Also, you experience Divers (also called Frogmen) in the large pool. When you have collected the Green Pass Card, use the tunnel provided to return to the control room and utilize it. This, as aforementioned, lets you finally get to the Level Exit.
Diving Area
Diving Area is much harder than the previous level, with more enemies, more puzzles, and the introduction of a brand new, deadly enemy; the Flamethrower. Gladly, their reasonably easy to kill, with the right weapon. Also, the M16 can be found amid this level, but you shouldn't be using it until at least halfway through the Maria Doria levels.
Diving Area also introduces Toxic Pools, Long Ladders and Fatal Hooks (these are only seen in the first part of the level, after the Big Fan section). The main part of the level is located around or in a perimeter hallway. Two doors can open, and if you look through one door you can see a part of the previous level. When you first enter this area, a Flamethrower lies around the corner on the left, and four Dobermans assist him when you approach that corner. The Flamethrower is simply a pyromaniac and will love to set Lara on fire, so you must kill him and the dogs quickly. The rest of the level entwines itself around this perimeter hallway. It is mainly about shutting off the saw hacking away at the Red Pass Card (it's deadly to Lara if she goes near it) by getting two machine chips. When this is completed, Lara will use the Red Pass Card door in the middle of the perimeter hallway room (It had opened from getting the second machine chip) so she can access the Diving Area for real. Here, submarines are used to excavate and investigate the destroyed ship of the Maria Doria, which was sank by Tibetan Monks some years ago. The ship had belonged to Marco Bartoli's father, Gianni Bartoli.The reason of the excavations were explained by a captive monk, Brother Chan Barkhang. At the very end of the level, a movie plays that shows that Barkhang's father had sunk the ship as it contained the Seraph, an important key in the quest for the dagger. Barkhang also explained to Lara that the Seraph had been stolen from his monastery in Tibet by imbecile vagabonds centuries ago. This Seraph was uncovered by Gianni, and so the monks feared that he would come to the monastery and utilize it. They were determined to protect the entrance to the catacombs which the Seraph opens, and so sunk the Maria Doria to the bottom of the Adriatic, where the monks had hoped the Seraph would lie forever. Barkhang commented on Bartoli as "infected with madness, he has a violent mind, but not yet the power to satiate it...". As he then talks to her about the Seraph, Lara changes into a wetsuit, a piece of clothing she would wear for the next four levels. Before Barkhang could change do anything else, however, he was shot by Bartoli from above. Lara draws her pistols and begins shooting as Bartoli does likewise (no bullet hits either) and Lara jumps into the Diving Tunnel just as the submarine dived for another excavation. She clung onto it as it exited the rig and slowly descended to the sea floor.
The Maria Doria Ship
The Maria Doria is a luxury ocean liner that Lara has to explore for four levels to discover the Seraph, which Brother Chan had explained about. It is notable that each level is set in a different part of the ship:
- 40 Fathoms - Set in back of ship areas, engine facilities.
- Wreck of the Maria Doria - Set in the more luxurious and leisure area.
- Living Quarters - Set in piston and engine room and entertainment areas.
- The Deck - The deck, wedged in an underwater cave, of the ship.
40 Fathoms: Three Big Puzzles
40 Fathoms is the first level in this part of the game. 40 Fathoms is a good example of how Tomb Raider 2 focuses on puzzles. This particular level has three reasonably difficult puzzles, which are noted below:
- The Burner Hall Puzzle.
- Swimming Up and Down Puzzle.
- Moving the Earth Puzzle.
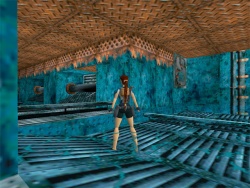
Anyway, the Level starts with a short clip showing Lara on the back of the submarine, her air supply coming from breathing apparatus on the outside of the craft. The driver, ignorant of her presence, then notices her, and uses a mechanical external arm to try to get her off. However, he is too busy doing this to notice a Great White is coming towards him, and when he does finally notice it, he panically dives the craft right into undersea rocks, and the craft collapses. Lara detaches herself from the craft and, obviously, needs to find some air. She enters the ship through a tunnel by a giant anchor sticking out of one side of the Maria Doria. Then, after getting away from the shark tailing her, she enters the first puzzle; The Burner Hall Puzzle. This puzzle is about getting past a row of burners in a hallway so you can access the rest of the level. It uses multiple switches, and quick movement, as most switches are on timers. There is also a dark hallway in the middle of the complex, where you start. There is a ledge up there you must pull up to, and a switch to pull. Pulling it activates a cinematic of a door opening in the complex. Find it (it's not the one by the shallow pool) and that's where the trap quickness begins. You must discover the way to order the switch pulls in order to turn off all the burners temporarily (for about 10-15 seconds). Past the Burner Hall is the Swimming Up and Down puzzle, which involves swimming up through the chambers, pulling a switch, swimming down again, pull another switch in a room that opened with the first switch, and then swim back to the top again. The next one is the Moving the Earth Puzzle. It involves moving the rock around this chamber so you can access rooms with switches that then in turn access the exit. Lara then exits the level through an opened door.
40 Fathoms, similar to the first level, is mainly about putting Lara through a series of traps and puzzles, but instead of in the air, now it's in the water. There are only five human enemies in the level (excluding a Frogman). Also note, though this is unimportant, that this level is very wet, and very rusty. The next level is very different, and the first signs of the once luxury ship are first seen.
The Wreck of the Maria Doria
The Wreck of the Maria Doria is mainly about discovering three circuit breakers that solve the largest puzzle. The level shows the remains of the once proud vessel. Below are the two main sections of this level.
The Three Circuit Breakers
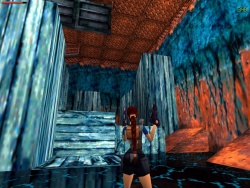
Near the start, you will come across (actually come through) a large overturned pool, then see a large and impressive ballroom, then a restroom. Finding the three circuit breakers are reasonably difficult. The first one is located on one of the tiers in the overturned ballroom, the second hidden in one corner of another overturned tier of another ballroom, and the last by one side of the doors in the restroom (but you can't get at it from that way). Once you have collected all three (you would of also discovered the Restroom and Rusty Key), you use them in another large chamber near the pool at the level start. They each shut down one of the three burners that are stopping you from reaching a hallway above. Once up there, the player must cross the huge ducts across the room until reaching a tall drop off to the water below.The Cabin Key
This part of the ship is where the captain and crew would pilot the ship. This area is about opening doors and throwing switches in order to get the Cabin Key from the water outside. However, there is angry aquatic life out there; Sharks and Barracuda's in particular. Once the trapdoor at one end of the area is opened, Lara has to avoid the denizens of the deep to salvage the key from the ocean floor, which opens a door near the tall drop off that started this section of the level. There is a switch in the room which opens a trapdoor back in the main area outside of the room This allows you to reach another switch (after moving a box) that lowers a trapdoor back in the Cabin Key room. This leads to another overturned, glass ballroom, with access to water, and the level ends (which is inside a cave overun with fish peril, but it doesn't matter, as this is the end of the level).
Living Quarters
Living Quarters has only one key, and that's near the end. Lara, still without the Seraph, ends up from the last level in a giant piston engine room. Note the switch high on the wall and the hallway leading off up above. The first part of Living Quarters is to move the pistons, so you can access that high switch, which floods are room with a water switch. When the room is flooded, the switch can be pulled, and that opens a door in the same room. This leads to an aquatic chamber with a sealed door up above. To open it, you must look for the adjacent chamber to the one you're in, and pull the switch that resides in there, but with caution. A giant moray eel guards it, and he lives in a small chamber in the right, so it's best to keep to the left. Then, atop the now open door, you must work your way along the ductwork until you finally do enter the Living Quarters. Everything, though old and damp, is almost as majestic as it once was. Loads of Rig Workers, Guards and Bosses are around here. The Theatre key needs to be found to access the theatre, and then to pull a switch that floods a small chasm with water so you can cross to the entrance to the deck.
Living Quarters is a rather interesting level, with intelligent puzzles, and also contains some well hidden secrets. Living Quarters is much more of a movement and key combination exercise than anything else.
The Deck
The Deck is the one of the most unnerving levels in the game. Not only is it dark (the Deck somehow got stuck in a cave), and has that strange, scary background music, but enemies are out in force around here, mainly because the Seraph is here, among the tall hulls and propellers. It is actually located in a Storage Shed just away from a pile of boxes near the Stern Key door, and requires a Storage Key in order to open it. There are three keys, including that one.The Seraph
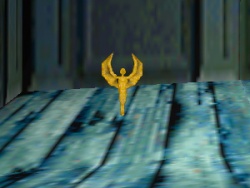
Use the key to unlock the Storage Shed after disposing of two Flamethrowers. The Seraph, waits in the corner. Picking it up ends the level.
It is now unknown where Lara gets her breathing apparatus seen in the Escaping to Tibet Clip, and how she gets back into the sea.
Escaping to Tibet Clip
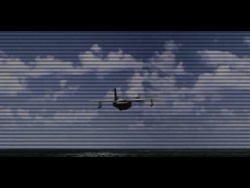
Lara is seen approaching the surface, with breathing apparatus. She is back in the rig, and clambers onto a platform. Stealthily, she jumps onto a plane in the bay area and takes off in it, heading in the direction of Tibet, where Brother Chan had said his monastery and the door the Seraph unlocks lies. Mid-way through the flight, she is seen taking approval of a bomber jacket (which is her new clothing for the next four icy levels). Trouble occurs when the plane runs low on fuel as it approaches the Barkhang Monastery. Her plane begins to fall and it takes damage, as Lara uses the ejector seat to escape. The plane crashes and explodes, and the ejector seat deposits her safely next to it, away from danger.
Tibet
Tibet consists of four icy levels. Here, textures (such as ladders) are different because of the ice, and Lara meets some of her most deadly enemies yet.
Tibetan Foothills
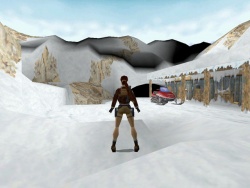
The Tibetan Foothills is remarkably brighter than the previous level, and releases some of that tension. The level also features the second vehicle in the game, the Snowmobile. Lara has the Seraph firmly in her backpack, but now hired mercenaries of the Fiamma Nera will stop at nothing to retrieve it. Note that mercenaries are twice as difficult to kill than the average Rig Worker or Fiamma Nera follower, because of either heavy padding on their bodies to impede bullets or an actual bullet (to a certain limit) proof vest. They are also deadly, with each one of them being armed. However, the Snowmobile can lend a hand. You can use the snowmobile to run them over. It's very effective.Lara starts the level in a bright alcove aside of a snowball trap pit. Past that is a long, winding path up to the hut, where the snowmobile is parked, and guarded by two mercenaries. A musical piece starts, called "Scoosh", or "Snowmobile Ride" or "Snowmobile Chase", when you clamber on the ride. After snowmobile ramps, more ramps, and finally a big jump, the player must retrieve the Drawbridge Key to raise the drawbridge in the adjoining area. Once this is done, the player can ride the snowmobile across the ice and into a cave, and the avalanche occurs behind Lara. Then, she must retrieve the Hut Key which unlocks the hut back at the Level start. It's in the snow after the avalanche, but when you attempt to get it, a mercenary riding an armed snowmobile, so Lara must kill him or he'll either shoot or run her over. When he falls off, do not take the armed one for the trip back to the hut; it's too heavy to make it over the big jump. In the hut, there is a switch, and once pulled, three mercenaries come out of a door. After killing them, Lara can get her own armed snowmobile off another mercenary, and then she uses it against two other armed snowmobiled mercenaries. After the battle, Lara can access the path to the monastery.
The Tibetan Foothills is the first of four cold and icy levels, and contains a range of new enemies, including Eagles, Leopards and, of course, Mercenaries. Using pistols against a mercenary is almost pointless. M16's are expected to be used almost constantly. One mercenary on his own can be dealt with with weapons such as Automatic Pistols or Shotgun (on close range). With more than one Uzis are needed on close range (M16 if they are far away), and possibly the Grenade Launcher, but it is important to save those for Level 14 in particular.
Barkhang Monastery
Barkhang Monastery is pretty amazing, large and complex. The level focuses on finding 5 prayer wheels so Lara can place the Seraph. Barkhang Monastery is also different as it is the only level to contain humans which do not attack Lara; in fact they help her. They are the Monks and Priests of the monastery, and they hate the Mercenaries showing up once again to take the Seraph. The fights between them can be interesting to watch. However, do not shoot Monks or Priests. The gaming method of targeting anything that Lara does not like of unfortunately comes into action against the Monks, and if you even if you only shoot one once, you'll turn the whole monastery against you, dramatically changing the difficulty of the levelLara finally places the Seraph in this level, right at the end. Placing it opens the entrance to the vast catacombs that lie below the monastery, in which lies the Talion. However, to open the door that accesses the Seraph fixture, Lara must find and place 5 Prayer Wheels. The brief location of each one is below:
- Prayer Wheel 1: The first prayer wheel is down a hall of unlit burners past a suction pool and slamming doors. The burners ignite when the Prayer Wheel is claimed.
- Prayer Wheel 2: The second prayer wheel is behind a box in a room that opens when one of the two gemstones is placed into a fixture opposite the door. The vicinity it is in can only be accessed by the Rooftops Key, which is found in the Strongroom (which can only be opened with the Strongroom Key).
- Prayer Wheel 3: The third prayer wheel is hidden behind another box in a large pool that needs to be drained in order to move it.
- Prayer Wheel 4: Through the valley accessed by the Trapdoor Key. It sits upon several boxes.
- Prayer Wheel 5: Located up several tall ladders in an area you fell into after escaping from four mercenaries that came from behind you.
Just by looking at the monastery, you can tell it's a holy place. A majestic and impressive Buddha statue lies across the Main Hall, the rooms are well detailed and just about everything is designed incredibly well. Upon placing all 5 Prayer Wheels, the Seraph Doors open, and you can place the Seraph into the fixture on the altar, and into the catacombs.
The Catacombs Levels
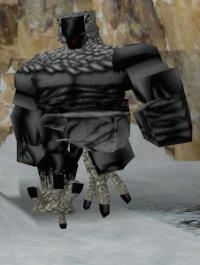
Both Levels 13 and 14 are about finding the Talion, the key that opens the Temple of Xian. Mercenaries remain in Level 13, but are thankfully gone in Level 14. Also, there is a new, quick and deadly enemy; the Yeti. It moves very fast on flat ground, and can seriously damage Lara's health meter with it's fists. They are also very loud and like to bellow when they can't get at Lara, so you will definitely know a Yeti even if it's in the dark. Yeti are sometimes caged, and to complete certain puzzles, a switch must be activated to free the Yeti's. As well as the Yeti, White Tigers are first seen (only in Level 14) and the most defiant and deadly enemy so far, and probably in the whole game aside the dragon; The Guardian of the Talion. As his name suggests, he guards the Talion.
Catacombs of the Talion
The Catacombs of the Talion are large ice caves, in which lies the Talion (in the Ice Palace). Mercenaries follow you throughout this part of the catacombs, and never seem to combat alone. Leopards are back, and are everywhere in the catacombs, along with numerous Yeti. Overall, these next two levels are icy, cold and deadly.
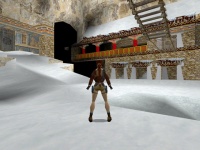
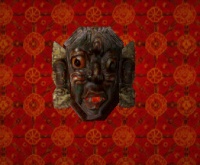
Lara starts this level with a sealed door behind her. In the opening area is a Yeti, and a switch. After that's been pulled, the player has access to a chamber with a pool, and a Tibetan Mask. In this level and the next, keys are temporarily replaced by Tibetan Masks. The first Tibetan mask opens a metal gate past a hole in the pool, which drains when the Tibetan Mask is claimed. The second Tibetan Mask is found in a small pool by a large glacier, and unlocks a room in the large area the First Tibetan Mask opened. Inside the room are four Yeti (currently caged).Note, as you go around the level you might notice switches or pathways high on the wall, and you find you haven't used or gone along them by the end of the level. This is because they will be used or walked along in the next level. Also note the hammer through the ice pool in an area adjacent to the glacier, and the large urn above it.
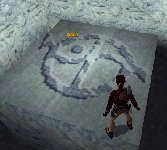
Lara ends the level in the areas past the double doors that are firmly locked when you first come into the area opened by the first Tibetan Mask. inside, and to a blocked room to the right (which is unblocked by snowballs). inside a pressure plates which need to be touched in a certain order to open the level exit.
Ice Palace
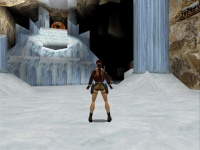
The Ice Palace centers over the battle with the monstrous demon known as the Guardian of the Talion. He is a giant, flightless, easily annoyed eagle who packs a powerful punch. Ice Palace involves returning to certain areas of the previous level. Mercenaries are thankfully gone, but a lot more Yeti are present, along with numerous White Tigers.The first section of Ice Palace is one of the hardest Level Openings in the game, in terms of pure movement. Ice Palace is the first level to introduce springboards (though they make only two appearances), which specialize in throwing Lara into places high above that would be impossible to reach by jumping, or any key combo. They can be dangerous, however. If you use one which flings you to a high distance, and you have no where to grab or land, then you'll just fall back to the ground and possibly die from the great fall that would inevitably follow. Towards the finale of the level, you will notice that you'll get a lot of Grenades, as these are the best weapons to use against the guardian when out in the ice field. It's pointless to use Pistols or Shotgun (shotgun only causes enough damage on close range, and the Guardian is very dangerous on close range, as he can smash Lara into the ice, possibly killing her with one hit.
After Lara has gotten past the springboards, Yeti and bells in the first area, Lara must flip the switch that will melt the ice pool where you saw the hammer in Level 13. Now you can get it, and through to the antechamber, where 3 Yeti are. Up ahead, the Ice Palace awaits, past a series of traps (which include snowballs, giant pits and long falls).
Guardian of the Talion
Lara uses the hammer to unseal the doors of the Ice Palace. The Talion waits inside the glowing large palace. Once claimed, and when Lara just touches the Ice field, the Guardian appears through the doors to the right of the palace.
Tactics in Fighting the Guardian
- If you get the Jade Dragon before claiming the Talion, you can use the hut it was in to take cover in, and use weapons such as the the Uzis or even the Pistols against him. You're safe inside. You can also use the area by the left side of the chamber which previously housed the Talion. It provides a much better view and better shots, and guns such as the Pistols can be used easily, and more importantly, safely.
- Note the guardian is large, but fast, and do not let him get anywhere near you. Because of this, the stationary weapon M16 cannot be used. Either move about frantically throwing grenades or use the hut for cover.
- The Shotgun is difficult to use in this battle, as the Guardian is dangerous when he's close to Lara, and the Shotgun is ineffective from the distance you should be from the guardian. Pistols and Automatics are only to be used when in a safe zone, either the Hut or the left side of the Ice Palace.
- Note that while Uzis always seem to stick the the target, Grenades tend to go off target as the Guardian moves. Because of this, it can be be difficult. You should most definitely attempt to fight in the Ice Filed the first time you fight him, as though the hut or sloped area are safe, you get a much better shot in battle. If you die, maybe try the Uzis, or then use the hut or sloped area to take cover in.
After 7 or 8 grenades (hits), or numerous Uzi shots, the Guardian will fall, and the level ends.
Jeep Chase
Lara is seen exiting the catacombs into a mercenary base through a crack in the foothills. She quietly approaches a jeep, which is being guarded from the front by a lone mercenary. Fortunately, she finds the keys inside, but when she starts the ignition, the mercenary notices. Lara guns it towards him, and the mercenary ducks out the way. As Lara drives away, the mercenary attempts to shoot. Several vehicles started chasing Lara, one being drove by either the sub-boss or Bartoli himself. Lara uses her shotgun against one vehicle with two mercenaries inside. They crash it, as the driver was shot, and the car explodes. However, Bartoli or the sub-boss is still on he trail, and shooting, and Lara approaches a gorge. Her car jumps over it, but Bartoli (or sub-boss) ceases to follow her as he is in a truck, and that would never make it over the gorge. Meanwhile, Lara makes her way back to the Great Wall of China, and the door that she first saw 13 or so levels ago. She now has the key. She places it in, turns it, and it opens the same as it did on the Prelude movie. The Dagger of Xian waits inside. Bartoli knows that she would be coming to the wall if she had the Talion, and so makes his way there. Lara leaves the Talion in the door, so Bartoli can unfortunately get in.
Temple of Xian
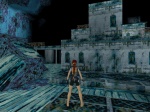
The Temple of Xian is very large, and takes some time to complete. When you start the level, the Dagger of Xian is in your reach, but before you go near it and get disappointed, if you look to the left side of this chamber while facing the dagger, you'll see a little corridor leading off; that's the Level Exit. When you approach the dagger, the walkway below it falls out, and you plummet all the way to the bottom of the level. The level is so large and complex, it's hard to explain how it works, but you first must open the Temple Doors, then get the Dragon Seal, then the Gold Key, then the Silver Key, then the Main Chamber Key. The Temple of Xian was built as a way to test those wishing the dagger by putting them through a series of difficult traps. Temple of Xian is all about traps, and no human enemy is present, just animals. It's just traps, traps, traps and a few movement challenges. Also, watch out for the red toxic water (or Lava), swinging spiked sacks, slicing blades, boulders, spiked walls in almost every direction and dangerous, current effected water. The Temple is readying you for the next level, though Floating Islands is more about defeating monstrous foes, it still has some of the most difficult movement puzzles in the game, though this is expected, being the last long level in the game (there are two levels after this which are a lot shorter).
Bartoli: Ritual Clip
Once you make it past the trapdoor the Main Chamber Key opened, you find your back in the Main Chamber where the dagger lies. But the Fiamma Nera are there, having accessed the Temple through the Talion which is still in the door, and Bartoli has the dagger in his hands. Bartoli is surrounded by his most loyal followers, Ninjas, or Knife Throwers, and Bartoli, plunges the dagger into his heart, surrendering his soul to the ancient power just as the Chinese Emperor did centuries ago. His followers carry his dead like body through an opened doorway, which is green (the main colour of the next level), and Lara follows, but is sent to a different part of Floating Islands than Bartoli and his Ninjas went; She is transported to the outside vicinity.
Floating Islands
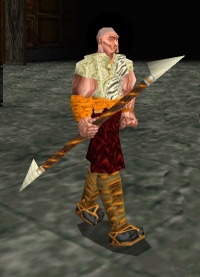
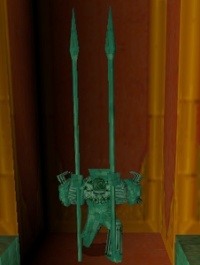
Floating Island removes all enemies fought before, and throws in two diabolical enemies. Xian and Warriors start as green statues which activate either when Lara moves to a certain place or when a switch is pulled. Xian are quick and deadly, and their spears hurt. Warriors can fly (very slowly) but when on land they move quickly, and their sword hurts as well.
Floating Islands has floating, green islands. Many Tomb Raider 2 fans have said that this is a different dimensions. If you happen to fall off and plummet into the darkness, Lara will die (or she might fall forever- but that would be stupid for the game over screen). In the Level Opening, Lara has to collect two mystic plaques and install them into their fixtures by a pair of double doors that lead to the main Dragon Temple. Their Lara makes her way around the area before descending into the Cage, an area full of enemies.The Cage
The Cage is a small area accessed by a switch, and introduces a new enemy, the Ninja , along with some Xian. Once Lara falls into the cage area, Lara has to pull the switch there to raise the cage, and starting a battle between her and the four Ninja there. It is dangerous to fight in the small space of the cage. The Ninjas are tough to beat (and don't forget there are four of them, and each of them throws deadly knives as a weapon), and if you step away from the central area, you'll activate some of the Xian, which makes it even harder. The best and, wisest way to fight them is to roll as soon as you have pulled the switch, and climb up to the ledge, and shoot them from there, avoiding the knives. From here, you can shoot them reasonably safely from above. Ninja leave quite al to of stuff behind when they die. Next, you have to deal with the four frozen Xian. Pick one, and move towards it until it activates, then run and climb back to the ledge on the wall, until every Xian is dead. Then pull the two switches that the Xian were guarding. One opens the exit, another opens a door to a zip line, which leads to the Dragon's Lair.
The Dragon's Lair
The Dragon's Lair is the final battle for the Dagger of Xian. Bartoli was transported directly to the healing chamber in the vicinity, where all newly stabbed people with the dagger of xian need to go to become dragons. Bartoli's punctured body lies on a pedestal. His ninjas guard the area outside the chamber, and so do several Xian, bent on protecting the new dragon. Once you've got through them all and placed one Mystic Plaque that a ninja dropped into a fixture by the doors that lead to the lair, they open. The battle awaits for the Dagger of Xian awaits.
As you might imagine, the Dragon is a deadly foe, breathing fire and he can use his claws and tail as a very dangerous weapon. Once in the Lair, approach the pedestal at the far end (also notice the doors around there too - that's where you go when you finally do kill the dragon). When you do approach it, Bartoli becomes a dragon, and you must fight him (obviously). The weapon of choice here is the Uzi, being hand-held, quick and easy. The M16 is more powerful, but you have to be either still or moving towards a target to fire, and staying still is very stupid when fighting this dragon, and moving towards it is stupider still. Pistols are pointless and useless, Automatics, barely better. You can use the Grenade Launcher, but the grenades tend to go off target, and the Uzis rarely do. You'll need about 300 Uzis shots to stun the dragon for the first time. in the seconds he is stunned you must rip the dagger from his belly before he can get back up. If he does, you must continue shooting until he does collapse again. Note, the dragon can't be killed, only stunned. Once the dagger is removed, the skin melts as Bartoli dies, but then the lair starts to collapse, and the aforementioned doors open. Run and jump as fast as you can away from the falling debris.
A small movie clip shows that Lara dodges exploding rock and fire and jumps out of a hole outside the Great Wall of China, just as the whole Temple of Xian explodes and that part of the wall is destroyed. She is knocked unconscious as she falls onto a bed of rock below. When she wakes, she sees the hazy destruction of the wall in front of her.
Epilogue: Home Sweet Home
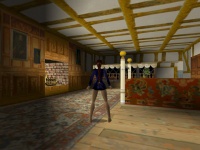
Lara returns home to England with the dagger of Xian, and is seen examining it on her bed, but then we hear tyre screeches and Dobermans from outside, and then her house alarm goes off along with the sound of breaking glass. Bartoli's remaining men have tracked her down to England and are attempting to steal the dagger. Lara opens her Gun Cupboard and takes the only weapon their, the Shotgun, and the excess of shells inside. There is also two large and one small medi packs inside, along with numerous flares. Lara has to kill all the Fiamma Nera's in the vicinity, in and outside her house, before she has to re-battle the Fiamma Nera sub-boss she fought with in Opera House. When he's dead, a clips shows Lara goes to the showers. She looks at the camera once there and says "Don't you think you've seen enough?" and shoots it with her shotgun. The credits then start at that point, but do not exit from them. Wait to the end, past the Final Statistics Screen that will appear, and you can select a new game, where you have all weapons with unlimited ammo! This dramatically increases the easiness of the game.
(In the epilogue, it is unknown where Winston is, but as he is present at the Training Level of Tomb Raider 3, he has obviously survived the conflict of Home Sweet Home)
External Links
http://www.tombraidergirl.com/tr2/ | Tombraidergirl walkthrough website (Tomb Raider 2)
Internal Link
Continue with Tomb Raider III Story (currently in progress)
